After reading this, swear that you will never throw unorganized pics into your picture folder again. Do it on your honor as a Stark.
This post has three goals:
- Ensure you never again lose a picture to file corruption.
- Ensure you are able to find any picture you need at any time.
- Help non-professional photographers, like myself, keep their stuff safe.
Step One: Save Pictures The Correct Way
Set up your camera to save pictures with a certain date/naming pattern. If your camera only saves things as DSC2525 or something, find your user manual and change that to YY-MM-DD DSC2525. Some cameras won’t allow you to do that, but it’s worth checking out.
Step Two: Organize Your Pictures The Easy Way
- Whether your camera allows you to do Step One, modern cameras have the date a photo was taken. You can most easily see this on your computer when viewing your files as a LIST instead of as thumbnails.
- Working down from the year to the day, group all pictures from the same day and event together. If I’m visiting several sites on the same day, each site gets its own folder
- Top level folders are the years (2018, 2017, 2016, etc).
- 2018
- 2018_08_14 California.SanDiego.Dinner
- 2018_08_14 California.SanDiego.WineryDayTrip
- 2018_02_22 Nevada.Vegas.ThatThingWeDoNotMention
- 2017
- 2016_05_12 Italy.Ravenna.SanVitale
- 2016_05_12 Italy.Ravenna.Lunch
- 2018
- Top level folders are the years (2018, 2017, 2016, etc).
So, yeah, there are LOTS of folders in these yearly folders. That’s totally okay. Be sure to make these folders as descriptive as you need them to be. Remember, folder titles are also searchable:
- 2015_12_15 GettingMikes Nasty Stitches Pulled Out
- 2015_11_22 Grandma’s House When Mike Busted His Head Open
To Plagiarize myself: Why not organize photos by type? Or person? Or place?
Let’s say you have the following picture folders:
- Vacations
- Dogs
- Holidays
- Kid 1 Lwaxana
- Kid 2 Troi
- Grandma Kay
- Work
- Beach and River Pics
How would you file a picture of Lwaxana with Memaw on the beach during Winter Break when Memaw gave Lwaxama new puppy? Which folder are you going to put THAT in?
Me? I’d put it in the 2018_12_26 folder and tag it.
Step 3: Use Tags To Organize Photos
aka: How to find absolutely everything on your computer in 0.2 seconds.
Tagging is the easiest thing you aren’t doing. Seriously. Tags are digital treasure maps. You can find anything on your computer if it has the correct tag. This applies to documents, pictures, spreadsheets, anything.
To add a tag, right click on a picture (or a set of pictures). Select properties. You’ll see an option to add tags. Tags can be names of kids and pets, they can be places or types of architecture. Annnnnything.
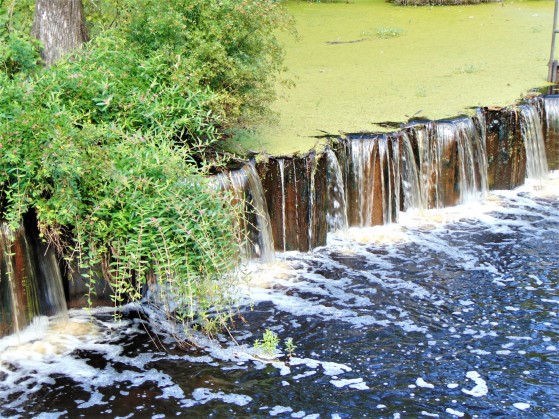
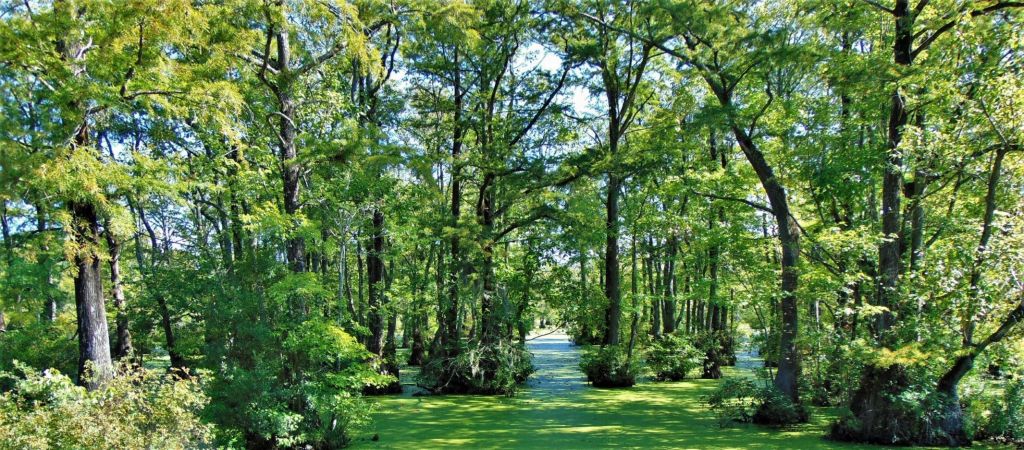
The image above has the following tags: pond, flora, dam, state park, North Carolina, Millipond, water, hiking trip. Searching for ANY of those words will bring up this picture on my computer.
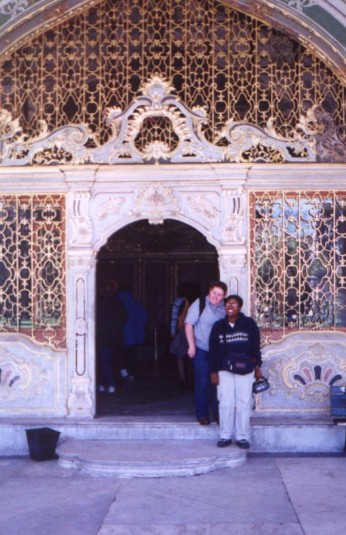
The tags for this image are: Me, Name of Other Person, Istanbul, Turkey, Topkapi Palace, Door, Fanny Pack, Marble Floor.
Add as many tags as you want to an image. Who knows? Maybe I want a collage of fanny pack pics one day. I dunno. But I DO know that if I type in fanny pack, I’ll get a stupid number of pictures.
Y’all, this is SO EASY. When I get home (or to the van or a hotel), I throw my pictures in a folder and highlight/select them all. I tag the whole group with country/place/state/city. Then I narrow in on specific things in each picture. This takes about 10-20 minutes.
Random Sidenote: Tags are especially useful for lesson planning, lecture notes, genealogy scans/clippings, and all sorts of nonfiction research. Do it! It’s like having built-in Evernote or LightRoom.
Step 4: Backup Your Data
Remember the 3-2-1 Rule
- 3 copies of everything
- Saved in 2 different formats
- With at least 1 copy offsite
Your offsite copy could be DropBox or Google or whatever. It could just as easily be an external drive in a cabinet at your office or your brother’s house. I keep a drive in a safety deposit box at a bank (they’re cheap these days) and rotate it monthly. You could also use a service like Backblaze or Carbonite.
Here is my travel photography workflow. See if I hit all of the steps in the 3-2-1 rule:
- Upload images from my phone and camera to my computer each night.
- Create a new folder for the day (or however many folders for the number of sites I visited that day)
- Back up my images to a second hard drive that is always with me.
- Note: I do not erase/format my camera’s memory cards. They’re so cheap these days that I use them until they are full and then archive them.
- Bonus: Now the images are in three places: the computer, the external hard drive, and the memory card
- Eventually, back up my images to a fourth source.
- I keep this one separate from my laptop. That way if something is stolen or damaged, I still have my pictures. If your camera saves to two memory cards at once, just add the second memory card to your purse/wallet.
Assuming you have a fast drive, this process can be done while having your bedtime tea or catching up on Stranger Things.
If you made it this far, you can probably tell that I’m super passionate about data and archiving. Here are some details that didn’t really fit anywhere else:
- I store my used SD cards in an old Crown Royal bag in that same bank box mentioned above. Klassy.
- To get started right now, grab this Western Digital Easy Store external hardrive. It is lightweight and easy to use. I always keep one in my purse for on the go usage.
- Drives will fail. Files will corrupt. Technology will become obsolete (remember Iomega disks??). As new technologies come out, update your storage options.
- Here are two articles on the threat of a Digital Dark Age (as technologies change, future generations won’t be able to read what we create now):
- American Scientist: Avoiding A Digital Dark Age
- NPR: Our Era Could Become The ‘Digital Dark Ages’
I love talking about this stuff. Feel free to post questions. If I don’t know the answer (likely), I can find someone who does (for sure).
This post contains an affiliate link.

21 responses to “How to Backup, Save, and Organize Your Travel Photos”
My husband and I were just discussing this same topic over coffee this morning. We’re preparing for a long trip on December first and how to keep track of all the pictures! Thank you very much!
Caroline Aguiar
LikeLiked by 1 person
Yay! Glad it was helpful 😃
LikeLiked by 1 person
I have mine principally stored in a cloud thereby guaranteeing my soul will be eaten by the Google Overlords. I will bear all of this in mind, however. I would like to have a safety deposit box simply to tell people I have one and then be all mysterious about what’s in it. 😀
LikeLiked by 1 person
LOL. *whispers: 83% the real reason I got one in the first place*
LikeLiked by 2 people
*Laughs diabolically* 😀 😉
LikeLiked by 1 person
You are so organized. I upload and backup my photos daily, and put them in folders, but my 2018 folder has 6000 + photos, with numbers only, and it takes me a while to find one. These are great suggestions, thank you.
LikeLiked by 1 person
You’re well ahead of the game by backing up daily!
LikeLiked by 1 person
… but still far behind your impressive system!
LikeLiked by 1 person
Such good advice! I’ve lost all my photos twice because I hadn’t backed them up and it was devastating.
LikeLiked by 1 person
Oh no! Sorry for the lost pics. Been there and it sucks. 😥
LikeLiked by 1 person
Thanks. I’ve bookmarked this to use later.
LikeLiked by 1 person
Glad to help!
LikeLike
Awesome blog 🙂
LikeLiked by 1 person
Thank you (and ditto)!!
LikeLike
I didn’t know about adding tags to files! Great tip!
LikeLiked by 1 person
Happy to help!
LikeLike
[…] Not only are you reliving (hopefully) kick-butt memories, but you’ll be able to see how your photography improves, note what you need to improve on (in my case, trains in motion) and keep a wonderfully digital portfolio of your life and travels. Of course, if you haven’t been tagging your photos, this monthly review would be a great time to do that (more on how to tag and organize pictures here). […]
LikeLike
I loved all the orderly process to this. It’s how I’m wired but has been on my “to do” list for a long time. This would be a great project for me right now and your tips would be a huge help. My photos and journals were always the only animate objects that I might risk a burning building to save. That said, I should act on the safety deposit box too. Thanks for the great information.
LikeLiked by 1 person
Yay for journaling (and planners)!
LikeLike
Fantastic advice! Thank you so much for sharing it!
Steve.
LikeLiked by 1 person
Happy to help. I’m a weirdo about files, lol.
LikeLiked by 1 person